How to Pack Motorcycle Tank Bags for 7-Day Adventure Tours in Spring 2026
A recovered top-picks entry restored from the saved product data for this article.
Our Top Picks
Affiliate disclosure: if you buy through these links, we may earn a commission at no extra cost to you.

A recovered top-picks entry restored from the saved product data for this article.
A recovered top-picks entry restored from the saved product data for this article.
This guide gives you a direct answer on How to Pack Motorcycle Tank Bags for 7 Day Adventure Tours in Spring 2026 plus the practical steps, tradeoffs, and key mistakes to avoid before you dive into the full breakdown.
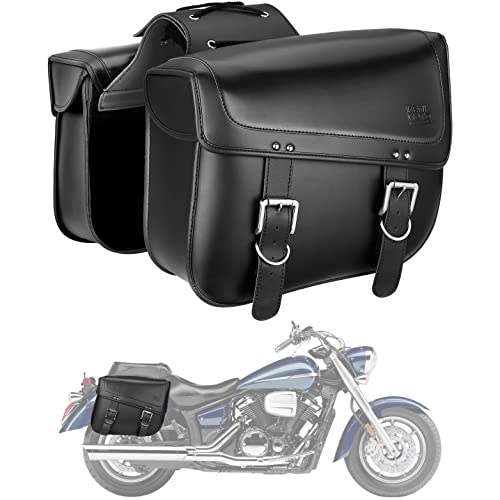
KEMIMOTO Motorcycle Saddlebags, 30L Large Capacity Saddle Bags Motorcycles, PU Leather Motorcycle Luggage Bag for Sportster Softail Dyna V-star Shadow, Universal Motorcycle Accessories, Black
$93.48Check Price
Table of Contents
Table of Contents
- Choosing the Right Tank Bag
- Organizing Your Essentials
- Weatherproofing Your Gear
- Mounting and Securing Your Tank Bag
- Optimizing Riding Comfort
- Seasonal Variations in Volume and Durability
- Frequently Asked Questions
When planning a week-long spring adventure on your motorcycle, your gear setup can make or break the experience. A well-packed tank bag keeps your essentials accessible, organized, and protected from the elements, all while staying secure on the move. Overloading or poor packing can hamper comfort, affect bike handling, and even compromise safety. This guide cuts through the fluff—helping you optimize your tank bag packing for durability, weather resistance, and riding comfort, no matter if you're commuting, exploring remote ADV trails, or touring cross-country.
Mastering the art of packing your tank bag ensures you stay focused on the ride, not your gear. Let’s dive into how to select, pack, and secure your tank bag like a pro.
Choosing the Right Tank Bag
Start by matching your riding style and bike with the appropriate tank bag. For a 7-day spring tour, consider a mid-sized bag (around 8-15 liters) that balances capacity with unobstructed steering. For ADV or dual-sport bikes, look for rugged, abrasion-resistant materials with secure mounting systems—molle webbing or buckled straps. Touring bikes can handle larger, more streamlined designs with quick-release mounts for easy detachment during stops.
Attachment systems are crucial: a solid mount prevents shifting at highway speeds and over rough terrain. Check if the bag offers looking locks, quick-release mechanisms, or tank-specific mounts. Also, consider compatibility with your fuel tank shape—round, elongated, or angular tanks influence fitment. The right bag adapts seamlessly, avoiding movement and potential scratches.
Organizing Your Essentials
Pre-plan what goes into your tank bag. Keep daily essentials—your phone, wallet, sunglasses, GPS, and snacks—in easily accessible outer map or clear pockets. Use internal compartments or removable pouches for clothes, toiletries, and chargers. It’s smarter than dumping everything loose and helps avoid digging for gear mid-ride.
Reliability matters: choose gear with sturdy zippers, internal LID straps, or compression flaps to prevent items from bouncing out or shifting. For longer tours, add small dry bags or modular pouches—these keep your clothes and toiletries organized and protected from moisture.
Weatherproofing Your Gear
Spring unpredictability calls for weather-resistant solutions. Always pick a tank bag with a built-in rain cover or one that’s made of waterproof materials like tarpaulin or coated nylon. Even with a waterproof bag, pack your valuables in sealed dry bags or ziplock-inspired pouches inside for extra protection.
Secure your zippers with storm flaps or magnetic closures to prevent water ingress. When parking in rain-prone areas, use the rain cover explicitly—not just the inner waterproof fabric. This shields your gear from splashes, road spray, and unexpected downpours, keeping electronics and clothing dry and functional.
Mounting and Securing Your Tank Bag
Proper mounting is the backbone of safe, comfortable touring. Always follow your bag’s manufacturer instructions—misaligned mounts can cause dangerous shifting or damage to your tank finish. Use dedicated tank lock rings or straps with non-abrasive padding to prevent scratches.
Double-check the security before each ride—lift the bag slightly to confirm it’s firmly attached. During riding, if you notice any rattling or movement, stop and tighten. Remember, a well-secured tank bag stays put on twisty roads and over rough terrain, preserving your concentration and safety.
Optimizing Riding Comfort
Keep your tank bag from obstructing your riding position. Choose a low-profile model if you prefer a more aggressive sport or standard riding stance. For upright, relaxed touring, slightly larger or taller bags can work—just ensure they don’t interfere with your knees or handlebar grip.
Place your heaviest items at the bottom or close to the tank mount to avoid top-heavy setups that affect bike balance. Use compression straps or internal baffles to eliminate shifting, especially if carrying heavier gear. A stable setup minimizes fatigue and allows you to focus on the road ahead.
Seasonal Variations in Volume and Durability
Spring tours demand a flexible, durable setup. With fluctuating temperatures and occasional rain, choose a tank bag that balances volume with weather resistance. For early-season riding, bags with extendable compartments or modular pouches add versatility—more space when needed, less bulk when not.
Durability across seasons favors reinforced seams, resilient fabrics, and UV-resistant coatings. Spring soils and road debris threaten unprotected gear, so a tough exterior and corrosion-resistant hardware matter. If your adventure involves gravel roads or forest tracks, a rugged, abrasion-resistant bag is a smart investment.
Frequently Asked Questions
How much capacity should I choose for a 7-day trip?
Typically between 10-15 liters for essentials, with an option to expand if needed. Avoid going over 20 liters on your tank to prevent top-heaviness and handling issues.
What’s the best attachment system for a spring adventure tour?
Quick-release mounts with tank-specific locking rings or straps provide security and convenience. Look for rugged, weatherproof hardware suitable for mixed terrain.
How can I prevent water ingress during rain?
Choose a waterproof bag with a rain cover, and pack valuables in sealed dry bags inside. Always secure the zippers with storm flaps or waterproof covers.
Will a larger tank bag affect my riding comfort?
Yes, especially if it obstructs your knees or handlebar reach. Opt for a low-profile model for sport riding, or larger bags for upright touring if they don’t interfere with your posture.
How often should I inspect my tank bag mounts?
Check before every ride, especially after long days or riding off-road. Tighten straps and inspect hardware for signs of wear or damage.
Can I use the same tank bag in summer and spring?
Sort of. For spring, pick a weatherproof, durable bag with easy access. For summer, lighter, more breathable designs work well. Match your gear to seasonal needs—capacity, weather resistance, and mounting security.
Mastering how to pack and secure your motorcycle tank bag isn’t just about convenience; it’s about safety, comfort, and ensuring your gear survives the rigors of an adventure. A thoughtful setup minimizes distractions and maximizes your riding enjoyment. Now, equip yourself with the right bag, pack smart, and hit the road confident — your spring 2026 adventure awaits.